First off, I want to remind everyone when you are using painting materials of any kind, that if you get paint in your eye - or even if you think you
might have maybe rubbed a little bit of paint in your eye (or, say, Annie Sloan dark wax) - immediately flush it out. DO NOT think that since your eye didn't hurt immediately, that you are fine, and then wake up the next morning with your eye swollen shut and call in sick to work so you can go to the optometrist so he can tell you you have a slight chemical irritation but not, as you were imagining, a chemical burn,
thank God.
I'm just saying. Flush that stuff out.
Sooo....where was I?
Oh, yes. My first Annie Sloan Chalk Paint experience.
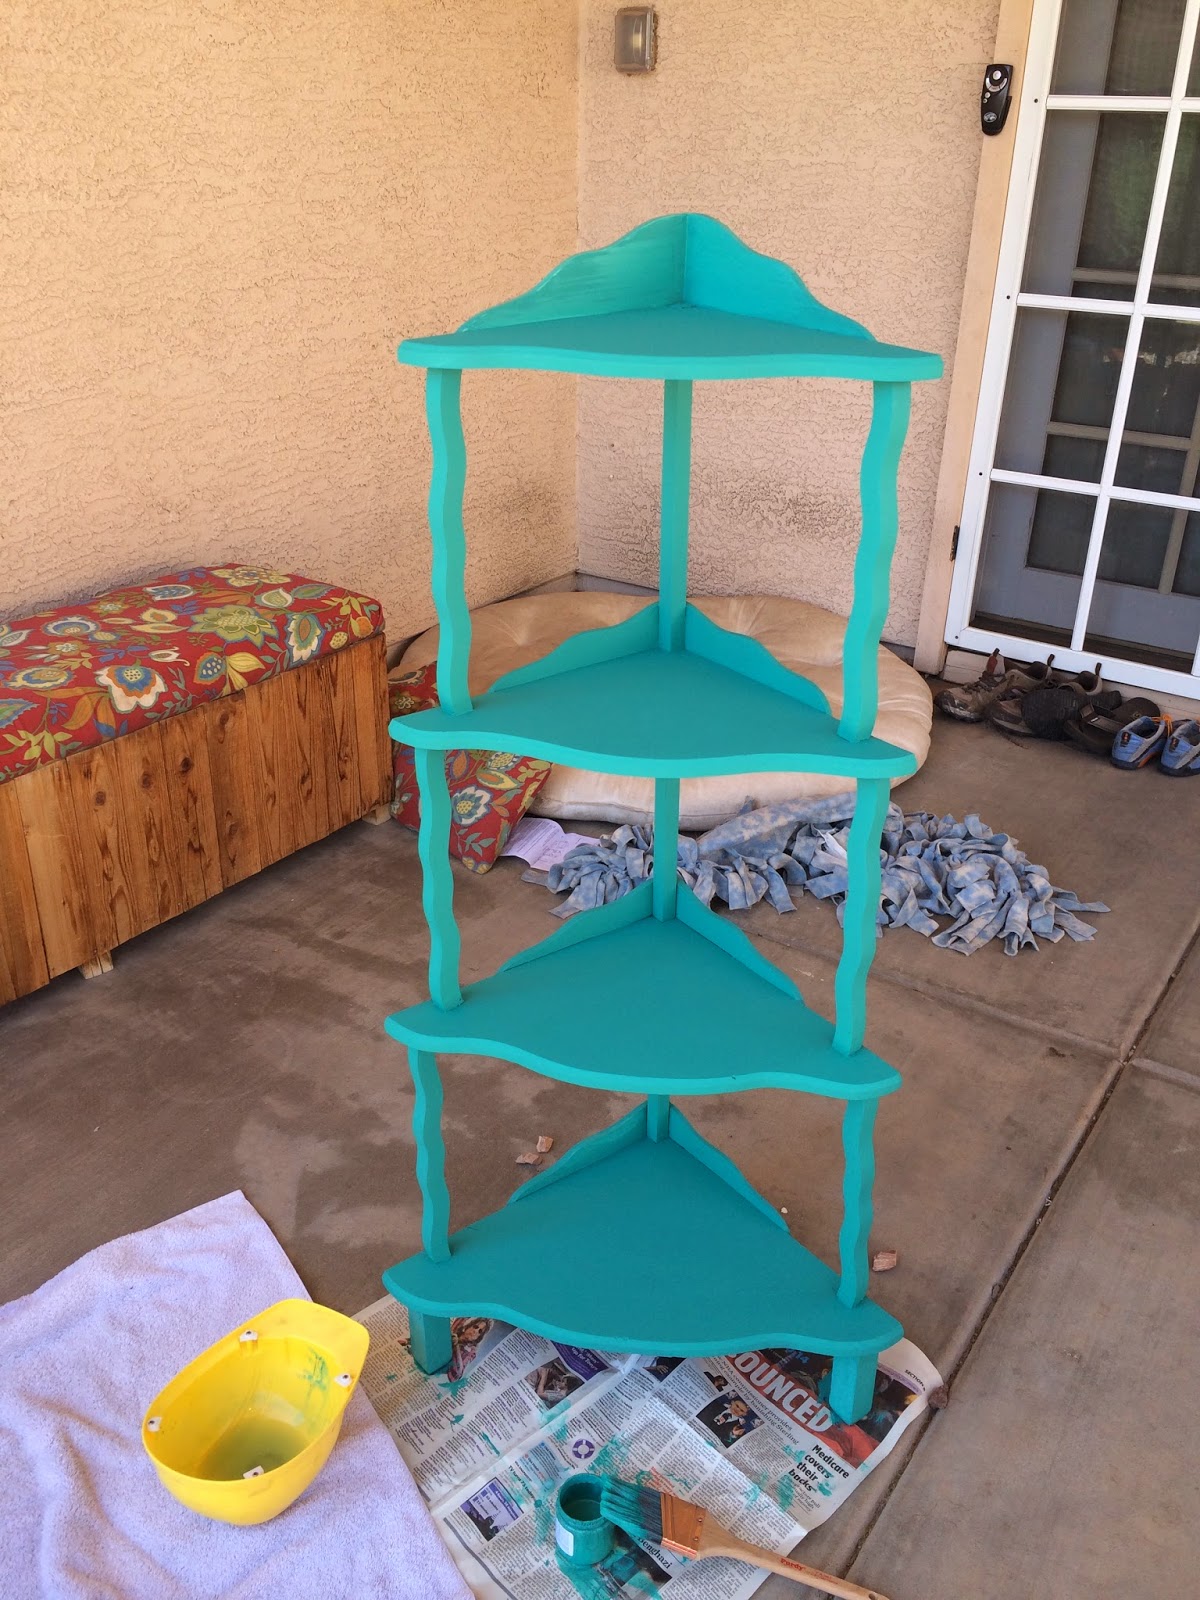
I chose a tiered shelf that has been in my kitchen since college. My mom gave it to me when they moved from Texas, and she said that
she thought it might have probably
was made by my grandpa (her Dad). It was definitely handmade by someone - and beautifully - so I choose to think that it was by Grandpa. For all purposes, and for the sake of argument, it was.
But it never really was my sort of thing. I kept it because, well, it was Grandpa's. You don't just toss family pieces into a garage sale. You have to find a way to take these old pieces and turn them into yours.
I knew I wanted to keep Grandpa's shelf, and I knew I wanted to use the insanely expensive Annie Sloan paint. I was not going to waste $13 on 4 oz of paint for furniture I didn't want to keep forever. I wanted to turn Grandpa's shelf into one I adored looking at, day after day.
I prepped the shelf with a thorough cleaning, top to bottom. Years of neglect came off, and it shone nicked and scratched and ready in the sunlight.
Which might have been my first mistake.
This paint dried immediately. Like, as I was brushing it on, it was
already dry.
I had heard it was fast-drying, but I expected to be able to start the second stroke before the first one was finished. That's seriously how quick it dried.
I'm not sure if it was because I wasn't using enough paint, or if it was because I live in Phoenix, where there is absolutely no breeze or humidity whatsoever, and I was in the sun. But my multi-tasking idea to combine a suntan with a paint job was not my best one.
I moved into the shade, and began painting again.
It dried a little slower, but still quicker than I expected. I piled on the paint, trying to cover it before it dried again. It was a race between me and the paint. And in painting as in real life, I have the tendency to lay it on a little thick. The top layer looks great, but feels much thicker than the others.
After the first level, I decided to not worry so much about creating a completely covered first layer, as I was going to "distress" it later. I could cover with a second layer later.
Besides, I had this little teeny tiny container of paint, and I was worried about how much I was using. I had heard Annie Sloan chalk paint covered well, and very little was needed. I may be an optimist, but when a tub of paint costs you $13, I definitely see it as half empty.
Even though the paint seemed dry enough to try a second coat immediately, I decided to give it the recommended 20 minutes, and I headed inside to watch few more "How to Paint" videos.
I came back armed with some useful advice. With my second coat, I would dip the paintbrush in my hard hat full of water (because I was just thatlazy to go inside and get a cup), then dip the brush into my paint. And it covered like magic.
Magic, I tell you.
The next time I paint with Annie Sloan chalk paint, I will be using the water trick from the start (maaaaybe not from my kids dress up construction hat, though). The paint went on smooth and easily. It took more than a few seconds to dry, so I had time to brush through my amateur brush strokes and globs before they were immortailzed forever.
I was a little worried that the paint would be thinner, or a slightly different color. Not at all. I used barely any water. I thought of myself as Jessica Simpson in the old Proactiv commercial. "
Just a dab will do ya." I didn't pour any water into the paint, but carefully controlled how little I wet the brush each time.
I was incredibly happy with the end painting result. And with how much paint was left; I still had almost 1/2 this teeny container left and I was finished painting!
But I still wasn't done with the shelf.
A friend had asked me what I wanted from this project, and I told her "I don't want it to be distressed, necessarily, but I don't want it to be matte-picture perfect, either."
Enter: Annie Sloan dark wax.
(This is where I have to give credit to The Hubs. I wanted a nice, clear wax and he steered me toward the dark wax, which would give it a more complex, darker look. This is also where I shout out to
Green Table Gifts in Tempe, AZ, who, instead of making a sale on this uber pricey wax, stopped me from buying the Clear Wax as a base, and then spent 10 minutes talking me through using the Dark Wax only, contrary to what the AS website says. Check out her store if you're in the Phoenix area. I will be!)
The woman at Green Table Gifts told me NOT to wax in circles, as is our tendency. (Wax on, wax off, anyone?!) Wax in straight, unbroken lines, and then come back to rub off that wax with a dry, clean white cloth. I used an old white shirt and white socks of The Hubs'. (What? Like I was going to use my own? No way.)
This took the longest time. It was a learning experience, and I started on the back, figuring out how it worked before I ventured to the front.
Again, think Jess Simpson in Proactiv -
less than a little dab will do you. The paint sucks up all the wax you put, so you can make it as dark or as subtle as you like. I chose a more subtle look, but it is still dark in places. Which I like, as it fits with the slightly-distressed-but-not-really look I was hoping for.
I dabbed the tiniest bit on the old sock, swiped across in a straight line, in sections about a foot or so long, and then came back with a piece of the white shirt to rub the wax off again. Seems silly to put it on just to wipe it off, but the after-effect is perfect. My only problem at first was using the entire t-shirt. I learned quickly that I needed smaller pieces to work with, so I cut it up.
 |
| See the difference with the dark wax and no wax at all? It's like a totally different paint! |
Longer places, such as the top of the shelves, tended to look a little uneven, and while I like that look, my next project is a sideboard given to me by someone I consider a surrogate Grandma. It has one long top, so the wax has to look a little more even. I will be taking a How To class on Annie Sloan paint and wax before venturing to that piece.
 |
| I also used a small paintbrush to fill in places my large brush missed - like the tight corners shown above. |
I began at 1:17 pm. I ended at 3:32. From start to finish, including breaks and rests and picture taking, my project took
a little over 2 hours.
I brought that shelf in my house an hour after,that less than 3 hours from the start of the project, de-cluttered a little and it was ready for use. That, in my mind, is a good enough reason to buy Annie Sloan chalk paint. I was able to complete an entire project in an afternoon after work while my kids were in daycare. I didn't put the shelf in the garage to dry for a few days, and then forget about it until I had more time. It was done, and back in its place in my kitchen, in less time than it takes to smoke a brisket.
Totally worth it.
And I love it.
 |
| I made the "O" too. Uber easy. |
I love the color. I love the style. I love the way it brightens up an oft seen corner of our kitchen. But most of all, I love that it feels like even though Grandpa has been gone for many years, it is almost like we made this shelf together. A real family piece. I love it.
.JPG)
.JPG)
.JPG)